Adding dimension to your scrapbooking projects can transform your layouts from flat to fabulous, creating visually stunning and tactile pages that truly bring your memories to life. Here are some detailed techniques and photo ideas to help you add depth and interest to your scrapbook pages:
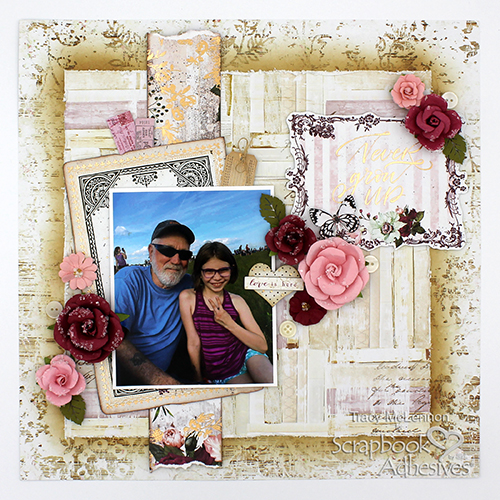
Layering Techniques: Layering is a fundamental method for adding dimension to your scrapbook pages. Start with a base layer and build up from there:
- Use patterned papers as your foundation, then layer cardstock, photos, and embellishments on top.
- Create photo mats by framing your pictures with slightly larger pieces of cardstock or patterned paper.
- Overlap elements slightly to create depth and interest.
Idea: Layer a series of smaller photos on top of a larger background image to tell a story or showcase a sequence of events.
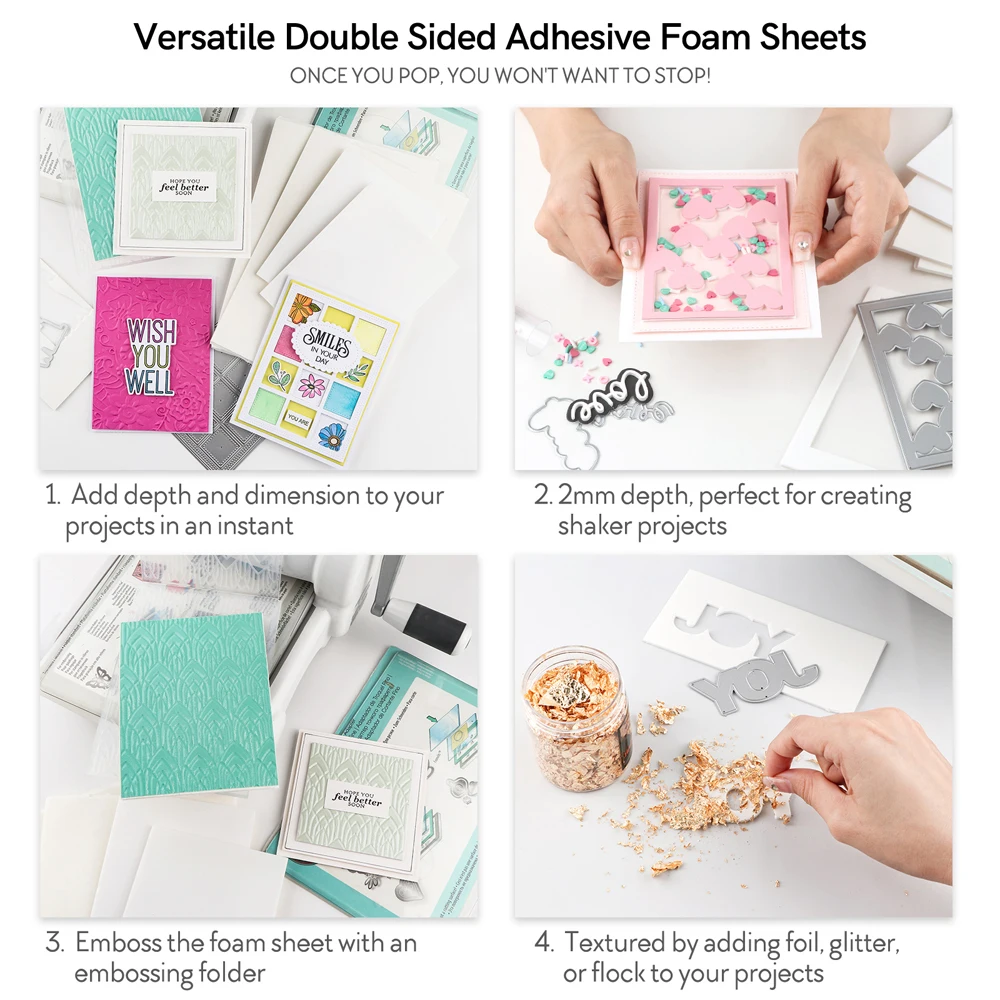
Dimensional Adhesives: Foam adhesives are your secret weapon for instant dimension:
- Use foam dots or squares behind photos, embellishments, or die-cuts to raise them off the page.
- Create different levels of height by stacking foam adhesives or cutting them into smaller pieces.
- Apply foam tape around the edges of elements for a subtle lift.
Idea: Pop up a central photo using foam adhesives, then arrange flat embellishments around it to draw focus to the image.
Embellishments and Textures: Incorporate a variety of embellishments to add visual and tactile interest:
- Use dimensional stickers that have raised elements or pop-out features.
- Add fabric elements like ribbons, lace, or small fabric flowers for texture.
- Incorporate natural elements such as pressed flowers or leaves for organic dimension.
Idea: Frame a nature-themed photo with pressed leaves and flowers to complement the image and add natural texture.
Die-Cutting and Paper Crafting: Utilize die-cutting machines and paper-crafting techniques for custom dimensional elements:
- Create intricate die-cut shapes and layer them for depth.
- Fold paper to make accordion elements, rosettes, or origami shapes.
- Use quilling techniques to create delicate paper coils and shapes.
Idea: Surround a wedding photo with die-cut flowers and quilled elements to create a romantic, dimensional border.
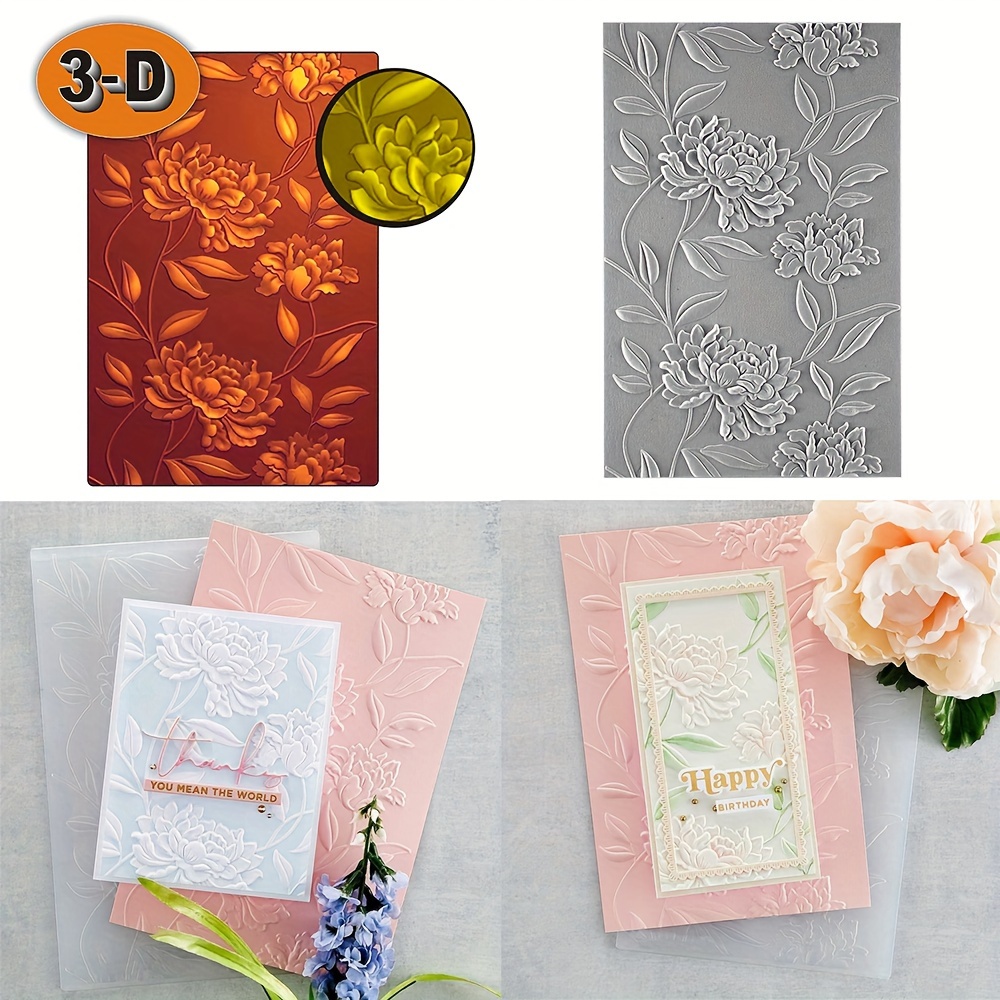
Embossing: Embossing adds texture and subtle dimension to your pages:
- Use embossing folders to create raised patterns on cardstock or patterned paper.
- Try heat embossing with stamps and embossing powder for shiny, raised elements.
- Combine dry and heat embossing techniques for varied textures.
Idea: Emboss a background with a pattern that complements your photo’s theme, such as waves for beach pictures or leaves for outdoor shots.
Mixed Media Techniques: Incorporate mixed media elements for added depth and texture:
- Use modeling paste through stencils to create raised patterns or textures.
- Add dimensional paint dots or lines to create custom embellishments.
- Incorporate small found objects or trinkets related to your theme.
Idea: For a travel layout, use modeling paste to create a textured map background, then add your photos and small travel-related trinkets
.Interactive Elements: Create interactive components that add both fun and dimension:
- Design flip-up or pull-out elements to reveal hidden journaling or additional photos.
- Create pockets to hold memorabilia or extra photos.
- Use accordion folds to make expandable sections within your layout.
Idea: Create a mini-album within your layout using accordion folds, showcasing a series of related photos that can be expanded for viewing.
By incorporating these techniques and photo ideas, you’ll be able to create scrapbook pages with stunning dimension that truly capture and enhance your precious memories. Remember to experiment with different combinations of these methods to find what works best for your personal style and the stories you want to tell through your scrapbooking projects.